How To Fix Your Ethernet Port In Wall Not Working
In common sense, a home ethernet is always faster and more stable than a Wi-Fi wireless network. That’s why people still stick to an ethernet with cables and ports.
Despite the Ethernet performance, some can't enjoy the high speed and good stability. This happens when the Ethernet ports in the wall are not working. Experiencing issues with the Ethernet port is frustrating, but fear not. You don't need advanced expertise to fix it. This comprehensive guide will walk you through the steps to make Ethernet ports work in no time.
Table of Contents:
- Quick Diagnosis: Why Is The Ethernet Port in the Wall Not Working
- Solutions: How to Fix Ethernet Port in the Wall Not Working
Why Is The Ethernet Port in the Wall Not Working
For professionals, they can identify the reason why an ethernet port is not working. But this is challenging for individuals with few skills and tools.
In general, there are 4 reasons why an Ethernet port is not working:
- Open-circuit: It’s disconnected from the Ethernet Switch or router;
- Crossing: The wiring of the wall Ethernet port is wrong;
- Short-circuit: If the corresponding port on the Ethernet Switch is not working, the one in the wall will not work;
- Short-circuit: A cable connects the wall Ethernet port and the Switch. And somewhere the cable is broken or rusty.
How do you know if any of these cause a bad Ethernet port in your case? Let’s read on for some quick diagnoses.
Tip: How does an Ethernet port in the wall work
Let me break it down for those who have no idea how an Ethernet port works.
- All signals come from a functional Ethernet Switch or router. There are several Ethernet jacks on the device.
- To make the cable Ethernet valid in the house, we will mount extra ports on the walls.
- Then, we will use a network cable to connect the jack and wall port.
- Next, connect TVs or computers to the wall ports.
How to identify the reason for a non-working Ethernet port
It’s important to know the real cause of a bad Ethernet port. Otherwise, we can’t apply the correct method to make it functional. Check out the methods below and start diagnosis now.
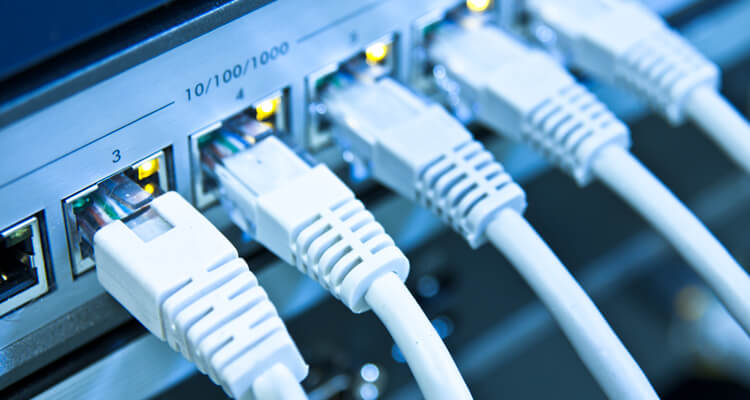
Check cable connection
Check the router or switch. Ensure all cables are correctly inserted into the jacks.
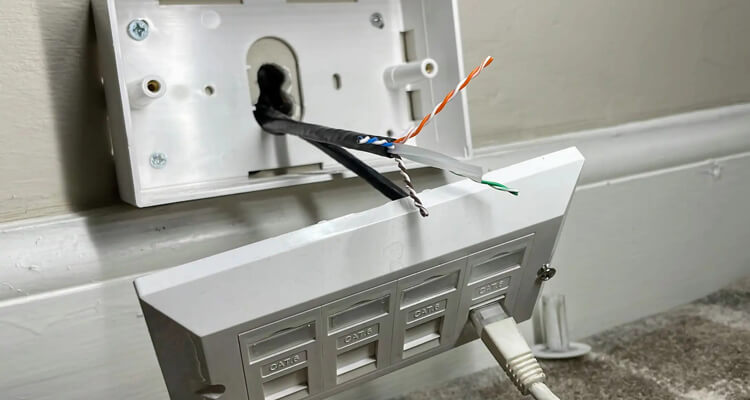
Check for cable wiring of the wall port
Uncap the Ethernet port in the wall and make sure the wiring is correct. (Check T-568B & T-568A standards for RJ45 Ethernet cable wiring)
Find damage on the cable
This is challenging as the connected cable is in the wall. You will have to unplug it from the switch and the wall port. Pull it out from the wall and examine it for damage.
Try a different port or switch
If it’s a hardware error, you can identify it by connecting the cable to a different jack or switch (or router).
Use an Ethernet & cable tester
Let’s ignore all the hard diagnoses above. As individuals, we can hardly identify the correct Ethernet port from dozens of them. Let’s not mention we need to check the wiring standard and the functionality of the switch.
But with an Ethernet & cable tester tool, a quick and easy diagnosis is assessable.
This is what network engineers will use for ethernet and cable inspection, maintenance, and repair.
For beginners, try NOYAFA NF-8601S to skip the complex selection process. This is a user-friendly and affordable tester tool.
Basic info about NOYAFA NF-8601S Ethernet tester
Produced by the leading icon - NOYAFA Manufacture in the industry, NF-8601S can help fix any network issues at home or office. Simply plug in the cable, and the tool will run a test and give you the result soon.
This is a multifunction tester tool with 8 functions:
- Port flash: locate ports on a router or switch. This helps find out which jack on the switch the wall ethernet port corresponds to.
- Mapping: check cable continuity. Beginners can plug in the cable to NF-8601S for a test. There’s no need to pull out the cable from the wall.
- Scan: find a target network cable from bundles or another room. If the port is not connected to the Ethernet switch, this feature helps us find the lost cable.
- TDR meter: measures cable length and displays broken wire location. When the cable is broken, we can get its parameters and buy a new suitable cable for replacement.
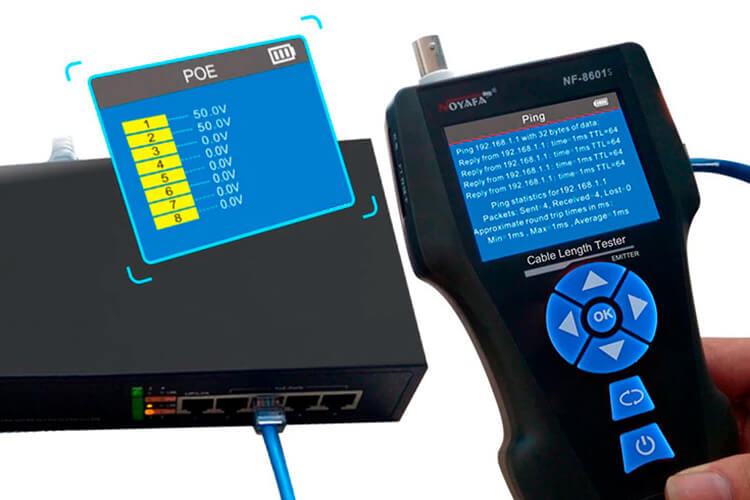
- PoE & Ping test: identify Ethernet jack information and status. This is the very feature to help identify a bugged Ethernet port or switch.
Now, let me show you how fast and easy it is to diagnose a non-working wall Ethernet port with NF-8601S.
Test an Ethernet port in the wall with NF-8601S
Step 1: Check the Ethernet Switch
To begin with, let’s make sure the Ethernet switch works fine.
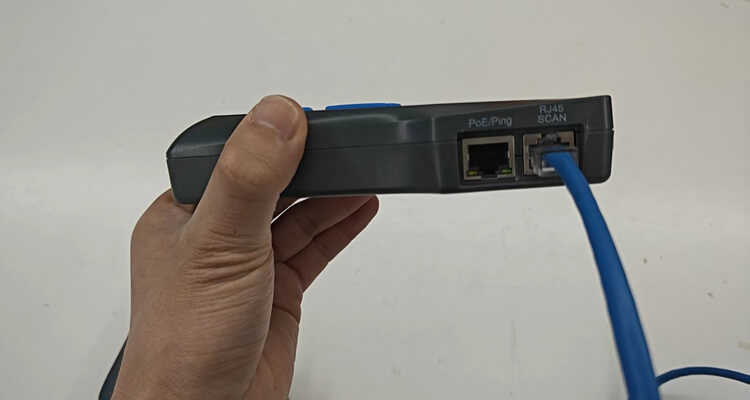
Launch NF-8601S. Plug an RJ45 network cable (find it in the package) into the PoE/Ping jack of the NF-8601S Emitter device.
Connect the other side of the cable to the random jack of the switch. Run the Ping test. NF-8601S will soon tell you the IP address, speed, and other information of this Ethernet jack.

If you see an error sign on the screen, this jack is bugged.
Repeat this process to all the jacks on the switch. Make sure every Ethernet jack is functional.
Step 2: Check the connection
Let’s see if the wall port is connected to the Ethernet switch.
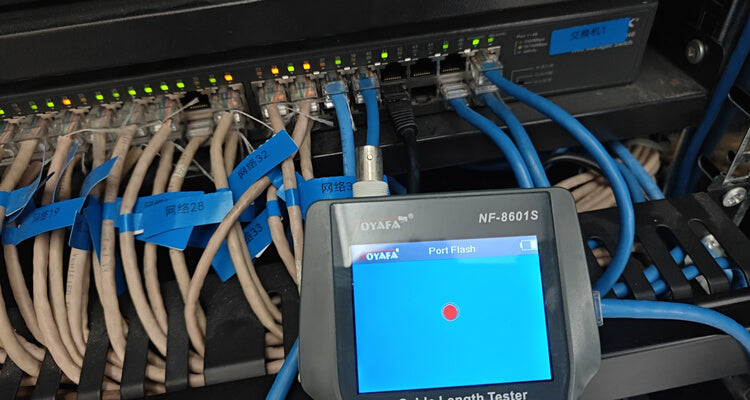
Connect the RJ45 cable to the wall port and the PoE/Ping jack of NF-8601S. Run the Port Flash mode. NF-8601S will display a flashing light on its screen. Go to the switch and find a port that emits the same light. You can tell by the color and frequency of the light.
If there’s no flashing light there, there are two situations:
The cable is not connected;
Something is wrong with the cable, broken or wrong wiring.
Step 3: Find the target cable
Search for any disconnected network cables around the switch. If there’s one, insert it into the jack. When there are several network cables, try this:
Keep the RJ45 cable connected to the wall port. Remove the other end from the PoE/Ping jack to the RJ45 Scan jack of NF-8601S.
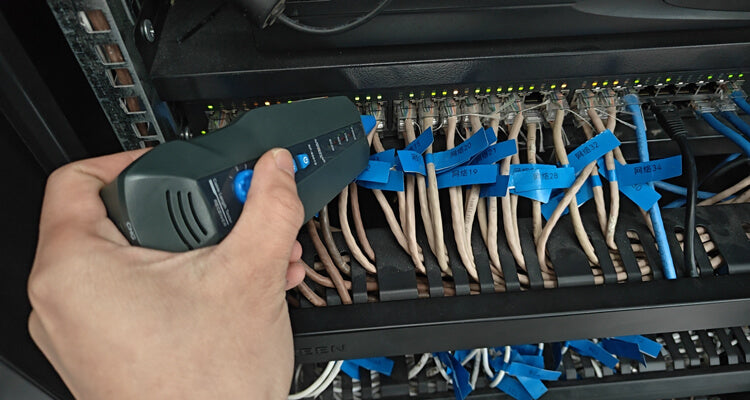
Take out the Receiver device and turn it on. Tap the probe to the disconnected cables around the switch. If there’s beeping, this is the target cable. Connect it to the Ethernet switch.
If none of the cables make the toner beep, there are two possibilities:
- The cable is not working;
- The wall port is not wired correctly.
Step 4: Check the wiring of the wall port
Uncap and unscrew the wall Ethernet port to expose the inner.
Here, you will find two cases:
- There’s no wire.
- The wiring is incorrect.
When installing networks, engineers might forget to mount the wires into the port. Or, they may have wired the cables in work order which led to a non-functional port.
Step 5: Test and measure the cable
When there are wires, pull out the wire and connect the other end to an NF-8601S Remote. And use the RJ45 cable to connect the Emitter device to the port.
Run a Wiring map and see if there’s any wiring issue. Next, NF-8601S will tell you if there’s any short, open, crossing, or split error in this cable.

Next, run a Length measure and see the locate of the error. And more importantly, know the length of this cable and buy a new one for replacement.
Wrapping up:
It may seem complex from the above steps. But as long as you follow the steps, you can locate the cause in minutes. And if you’re lucky, you won’t go through all the steps.
Now, get NF-8601S for a quick diagnosis for your home ethernet port.
Related Reading: How To Identify Ethernet Cables In Each Room Without Labels
How to Fix An Ethernet Port in The Wall Not Working
The tough part is over. After we unveil the cause, the methods to make this Ethernet port functional are easy.
Method 1: Apply to another Ethernet jack or Switch
When the Ethernet jack is not working on the Switch, plug the cable into another valid jack.
But once the whole Ethernet device is not working, you’d better buy a new one.
Method 2: Connect the cable
When the cable is not inserted into the Ethernet switch, the method is easy. Plug the cable into any Ethernet jack on the device. Your wall port will work.
Method 3: Replace the broken network cable
When there’s incorrect wiring or damage on the cable, replace the cable instead of re-wiring.
A re-wiring is much harder especially when you have zero knowledge. Still, if you’d like to try, try this:
Remove the cable from the jack and port.
Situation 1: Fix broken network cable
If the cable is broken, locate the breakpoint. Separate the cable in half from the spot. Then, remove the insulation of both ends. 8 thinner wires appear on each end.

Continue to remove the insulation of the 16 wires.
Twist two wires in the same color coating together. Repeat this for 8 times. All wires are tightly connected.
Wrap each pair of twisted wires with electrical tape.
Insert the cable back.
Situation 2:
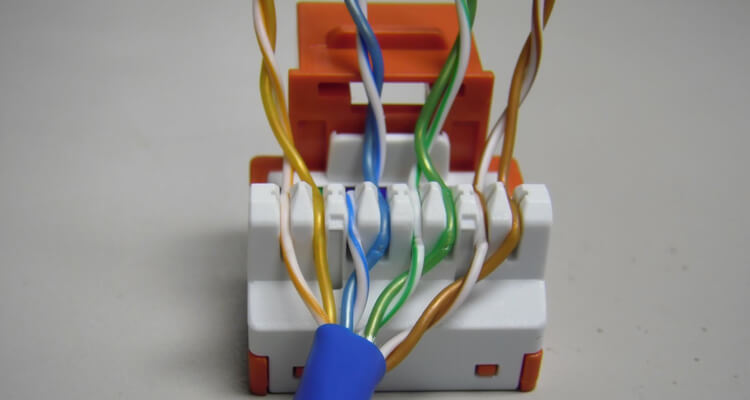
When the cable has crossed wires, uncap the Ethernet port in the wall. The wires appear. You need to re-arrange the order now.
There are two orders for two Ethernet standards: T568A and T868B. Use NF-8601S to run a PoE test on the router or switch. You will know the standard in one second.
|
Pin |
T568A |
T568B |
|
1 |
white/green |
white/orange |
|
2 |
green |
orange |
|
3 |
white/orange |
white/green |
|
4 |
blue |
blue |
|
5 |
white/blue |
white/blue |
|
6 |
orange |
green |
|
7 |
white/brown |
white/brown |
|
8 |
brown |
brown |
Mount the wires into the pins firmly under the correct order. Install the cap back.

Ultimate Tip: Hire a Professional
It's costly but 100% efficient and easy.
Even if you figure out the reason to a bad Ethernet port in wall, the solutions can be hard. Especially when you need to replace the network cable or remap the port.
Though after you make an appointment, the tech guy may take a day or two to come to your place for the repair. But it saves a lot of efforts.